CamStudio is a software that captures all the visual and audio activities on the computer screen, an..
2.7.2 Build r326| License: Free |
| Released: CamStudio |
| Request: Windows 2000/XP/Vista/7/8.1/10 |
| Last updated: 28-09-2021 |
| OS: Window |
| Version: 2.7.2 Build r326 |
| Total download: 984 |
| Capacity: 3 MB |
CamStudio is a software that captures all the visual and audio activities on the computer screen, and then outputs it to the popular AVI format file. Cam Studio also has a built-in SWF Producer tool to convert AVI videos into a more user-friendly SWF (Streaming Flash Video) format.

As mentioned above, not just a simple screen recording software, CamStudio can record all images and sounds from the computer screen. In case you don't like your own voice appearing in the video, don't worry. CamStudio can add screen annotations to illustrate the video. You even have the ability to customize your own video by recording your webcam in Picture in Picture mode (2 screens appear at the same time on the desktop).
And yet, CamStudio also integrates its own Lossless Codec to create clear sound, video files are compact in size compared to many other common codecs, such as Microsoft Video 1.
<3 lighter weight, making it easy to upload to a website, embed in a blog or send via email. If you want to burn a CD or DVD, choose the best quality video.
CamStudio is an extremely easy to use screen recording tool. You'll be familiar with Cam Studio in just a few minutes, and there's also a Help file to view more before you start recording with this tool. Press the Help button to get help whenever you need it.
CamStudio is an open source project, so it will be freely available to users.
After you successfully install the program, you activate the program. The main interface of the program will open, looking relatively similar to Media Player programs.
The main interface of the program consists of 1 row of buttons.
The next thing you need to take care of is setting some options for the program. Depending on the purpose, you will be able to set different options. The following article will briefly guide you through the important settings you need while using.
You can set the Size of the frame while recording the screen by clicking the Region option in the program interface. Here are three different options for you to choose from.
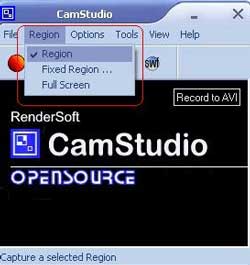
Region: This option will help you to manually set the size of the frame. For example, you record a movie to guide the operations on a certain software, then you set the frame to match that software window without having to rotate the entire screen. That will help the video file you output not be heavier than it should be (because the larger the frame, the heavier the file will be).
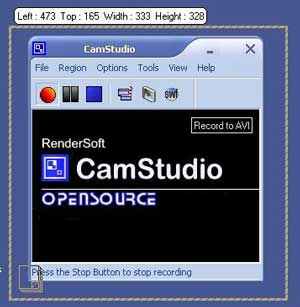
After setting this option, press the Record button to start recording the screen. A pen icon will be displayed, allowing you to drag the mouse to zone the area you need to record. After dragging the mouse to delineate the area, the program will start recording all activities in the area that you have circled. After completing the recording process, press the Stop button to save the recorded video.
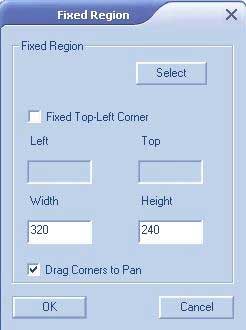
Fixed Region: With this option, you will be allowed to set 1 frame with a fixed area. Depending on the purpose, you will be able to set the frame width. Just like the Region option above, you will also be able to drag the mouse to zone the recording area by clicking the Select button in the Fixed Region window. After you have delineated the area to record, click OK to close the Fixed Region window and press the Record button to start recording.
Full Screen: With this option, the program will automatically record all activities on your screen without having to zone or select any area. Your job is just to press the Record button to start the recording.
After you have set the necessary size for recording, you need to pay attention to more things to ensure the quality of the image in the video file is good. In the main interface of the program, click the Options button to display a list of options.
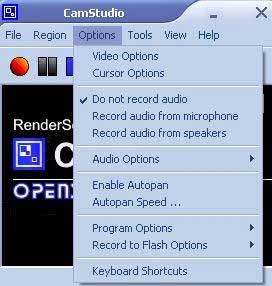
Video Options: This option will help you set information related to the quality of the image. After clicking this option, the Video Options window will be displayed. Here you only need to pay attention to two issues:
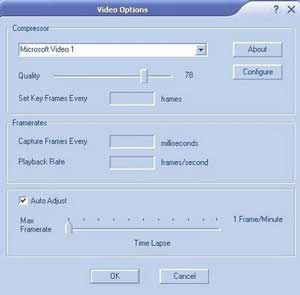
Quality: Quality of the recording image. If you adjust the higher the quality, the better the image quality will be, but it will make the output of the video file very large. So you should only choose a quality of about 70-75.
Framerate: This is the rotation speed of the program. There is an Auto Adjust option here, you should leave this option and drag the slider to Max Framerate to make the rotated image look smoother.
Cursor Options: During the recording process, if you need to display or hide the mouse pointer, you can set this option. After selecting this option, the Cursor Options window will be displayed.
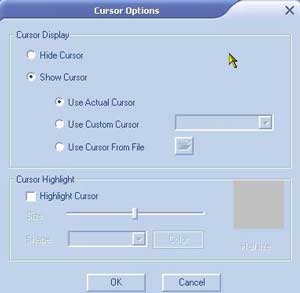
If you need to hide the mouse cursor while recording, you can check the Hide Cusor. option Otherwise, in the Show Cursor option there are three options. different. If you need to display the current mouse pointer while recording, check the option Use Actual Cusor. If you need to use another pointer provided by the program, type Check the Use Custom Cursor option and select a pointer icon in the program's list of mouse pointers. Conversely, if you need to use a different pointer icon among the pointers that you contain on your computer, then you select Use Cursor from file and click Browse to select the cursor icon you want to use.
In case you need to record sound while recording, your computer needs to be equipped with a microphone. Many of these things you can easily learn more while using.
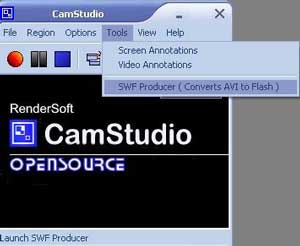
In addition to the function of returning to the action on the screen, CamStudio also has a function that converts the file format from AVI to SWF, besides it will create an HTML file containing that Flash, after converting If you change the format, you will be able to upload that HTML file to a host to share the video with your friends over the Internet. To use this function, in the main interface of the program, click Tools > SWF Producers (Convert AVI to Flash).
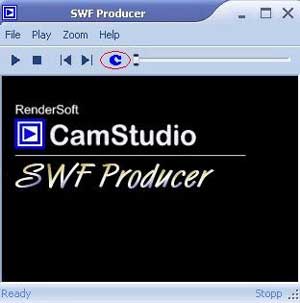
After clicking on it, the SWF Producers window will be displayed. Here, click on the blue C icon to select the AVI file that needs to be converted.
After selecting the file to be converted, the Conversion to Flash window will be displayed to let you set the optional information for the Flash file to be generated. Here, you will be able to select the link to save Flash files (swf files) and HTML files. In the Video Properties section, you will be able to choose 16 bits or 32 bits for the color of the Flash file that will be generated.
After you have set the necessary options, click OK to start the conversion process. Now, the result will be a Flash file and an HTML file. You just need to upload these two files to a certain server and we can share our own footage with friends over the Internet.
In short, CamStudio is a program with powerful functions to record your screen activities. And yet, if you are a programmer, or an exploratory enthusiast, you will be able to download the program's source code, to explore and possibly edit to make the program user-friendly and accessible. more powerful functions.
The above is the essential and basic information so that you will be able to record all your screen activities like using a professional camcorder. Now, with CamStudio, it seems that many of the things you need to forum on your pc will be much faster, simpler and easier to understand.
.
Like Camstudio, Cute Screen Recorder Free also supports users to ..
HandBrake is a software that can convert MPEG video to MPEG-4. Su..
Adobe Premiere Pro CC 2021 is a professional, high-end video edit..
MP4 To MP3 Converter is a computer utility that supports fast MP4..
Movavi Video Editor Plus 2021 is a great tool, providing you with..
5
4
3
2
1